By far the easiest way to configure your new (or not so new) rig to crunch some neurons.
Originally written in Medium: link here
This article will guide you through the whole process of setting up the required tools and installing drivers required for Deep Learning on your windows machine. Surprisingly, even setting up the environment for doing Deep Learning isn’t that easy. Chances of you breaking something during this process is actually pretty high. I have experienced setting up everything required for Deep Learning from scratch quite a few times, albeit in a different more programmer-friendly OS in Linux. (a guide on that is next in line)
There are very few articles explaining the same process for Windows at the moment. So I decided to give it a shot. Recently, after breaking things a few times, I finally found a proper solution to this problem. Not only this method results in a successful setup but it is also much easier than what I’ve seen most others do.
Who this tutorial is for and more importantly why Windows?
Trust me I am also not a big fan of playing with CUDA on Windows. But more often than not, as developers, we end up working on a laptop or on a powerful rig that’s not only utilized for Deep Learning or programming. In that case, you can’t afford to completely get rid of Windows. If you’re one of those people or just another casual reader owning a Windows machine who’s not that comfortable with Linux in general, this guide is for you.
Here are a few things we’ll be covering in this article,
-
Minimum Hardware and Software Requirements
-
Installing Python and required tools
-
Some GPU jargon
-
Installing GPU drivers
-
Installing Tensorflow (CPU and GPU)
-
Installing PyTorch (CPU and GPU)
-
Validating your Installation
-
My personal experience and alternative approaches
-
Conclusion
Minimum Hardware and Software Requirements
You definitely need an Nvidia GPU to follow along if you’re planning to set it up with GPU support.
Developing Deep Learning applications involves training neural networks, which are compute-hungry by nature. It is also by nature more and more parallelization friendly which takes us more and more towards GPUs which are good at exactly that. That is why GPUs come in handy, the vast majority of the deep learning frameworks support GPU-acceleration out of the box so developers and researchers can get productive in minutes without doing any GPU programming which can tend to hold them back.
Most of these frameworks (only) support something called CUDA — which can only work with Nvidia GPUs, that’s why you specifically need one from Nvidia. However, it is not impossible on AMD’s cards, for more information visit this page.
If you’re not going to set up for GPU, no problem you can still follow along.
But of course, you should have a decent CPU, RAM and Storage to be able to do some Deep Learning.
My hardware — I set this up on my personal laptop which has the following configuration,
CPU— AMD Ryzen 7 4800HS 8C -16T@ 4.2GHz on Turbo.
RAM — 16 GB DDR4 RAM@ 3200MHz
GPU — Nvidia GeForce RTX 2060 Max-Q @ 6GB GDDR6 Memory
For anyone who is interested in knowing about the configurations, I recommend a decent CPU with a minimum of 4 cores and at 2.6GHz, at least 16GB of RAM and an Nvidia GPU with at least of 6GB VRAM.
For this tutorial, you obviously need to be on Windows 10. I assume some basic knowledge of Python packages and environments. Nonetheless, it will all be explained.
It is recommended that you’re in the latest stable build of 64-bit Windows 10.
This tutorial also assumes that you start the installation process on a freshly installed Operating System. If not you can still follow along if you really know what you’re doing.
Installing Python and required tools
The first step is, of course, to install Python. I recommend installing Python through Mini-Conda. For absolute beginners, I will briefly explain why.
Conda is a package manager that helps you with installing, managing and removing all your different packages. It is not the only one though, there is pip — python’s default package manager which I really like. Here we go with conda as it is much more straight-forward and simple to set up in Windows.
Anaconda and Mini-Conda are software distributions that come with some very useful Data Science/ML packages preinstalled to save some of your time. Anaconda contains over 150 packages that help in doing Data Science and Machine Learning, which includes everything you might ever need whereas Mini-Conda only comes with a handful of really necessary tools and packages.
I recommend going with Mini-Conda because I like to have (almost) complete control over what packages get installed. Keeping things light is indeed not a bad thing at all. It can save you some storage space and of course, you’ll not have some 50 odd packages that you probably never use.
To install Mini-Conda, go to this link below, https://docs.conda.io/en/latest/miniconda.html
Download the Python3 installers for Windows 64-bit and install it as you’d install any other Windows software. Make sure to tick the checkbox which asks if you want conda and python to be added to PATH.
Now you can check if you have python and conda installed by running the following commands. They should display the version numbers otherwise you might need to correctly install mini-conda and add it to PATH.
1
2
3
4
5
> python --version
Python 3.8.3

> conda --version
conda 4.8.4
Next step is to install jupyter-notebook, paste the following command in your command-line interface,
> conda install -y jupyter
You can verify your installation by running the jupyter notebook, which opens up jupyter notebook for you on the browser.
> jupyter notebook
Setting up your Development Environment
This is an important step often missed by many people. It is understandable to use something that contains every known package like Anaconda but to work on your projects and actually build stuff you probably need a custom environment specific to that project or the nature of the work you’re doing. Another great advantage of using a dedicated virtual environment is you can isolate your packages from interacting with global settings which means if by any chance you mess up the packages in your environment you can always throw it away without affecting any of the global packages.
It also gives you the flexibility to create environments with any python version backwards in time. So you can stay away from all the new unstable stuff for a while and upgrade later based on support.
Creating a conda environment is fairly simple, I am creating it with the name tensorflow for the sake of explainability, you can set it to whatever you want. I am going with python 3.7 because I know it is well supported by Tensorflow. You can verify this through their documentation. By the way, this is where we will end up installing Tensorflow and create a similar environment with the name torch where PyTorch will be installed.
> conda create --name tensorflow python=3.7
Once the environment is created you can enter in using this command below, where tensorflow just means the name we gave to this environment earlier.
> conda activate tensorflow
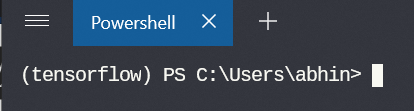
Once you enter inside the environment you’ll be able to see something like this one the left-hand side of the prompt
If by any chance you don’t see this on Powershell, you might want to initialize conda in Powershell only once beforehand,
> conda init powershell
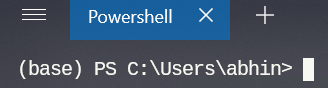
After that, you might see (base) on the left side as seen in the above image when you’re not inside any environments. You’ll see the env name whenever you enter an env after this.
Additionally, you can also install nb tools inside this environment and link it with jupyter notebook which we installed earlier
> conda install nb_conda
To register the environment with Jupyter Notebooks run this command without breaking lines,
> python -m ipykernel install --user --name tensorflow --display-name “Python 3.7 (tensorflow)”
To exit out of the conda environment…
> conda deactivate
Now follow the same steps to create an environment with the name torch
1
2
3
4
5
6
7
> conda create --name torch python=3.7

> conda activate torch

> conda install nb_conda

> python -m ipykernel install --user --name torch --display-name “Python 3.7 (torch)”
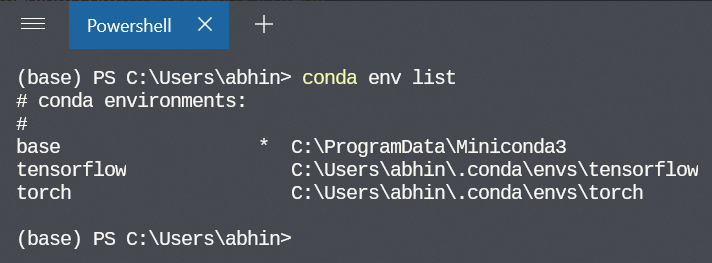
If the environments are successfully set up you would be able to see this while listing the environments,
> conda env list
To verify if the respective packages are actually installed inside each environment, you can enter into the environment and do conda list which displays the list of all packages installed in that environment.
 Don’t worry if the list is pretty long. Conda has already taken care of the bare bone stuff and dependencies
Some GPU jargon
Before jumping in and installing a few GPU related stuff, it is necessary to understand what is what and why you’ll need these things in place.
GPU Drivers — As the name suggests GPU driver is a piece of software that allows your Operating System and its programs to use the GPU hardware. Gamers certainly know this better, if you’re into gaming then you probably need to have this software up to date for the best experience.
CUDA — In simple terms, it is a programming interface layer developed by Nvidia that gives access to the GPU’s instruction set and its parallel computation units.
Since the GeForce 8 series of GPUs from the late 2010s, almost all GPUs are CUDA capable.
For more information, you can visit this page from Nvidia’s website to know if your GPU is CUDA enabled or not.
If you own a consumer GPU, for example, something from the GeForce lineup or Titan lineup, for instance, you can see a glimpse of what is supported and what is not in the image below,
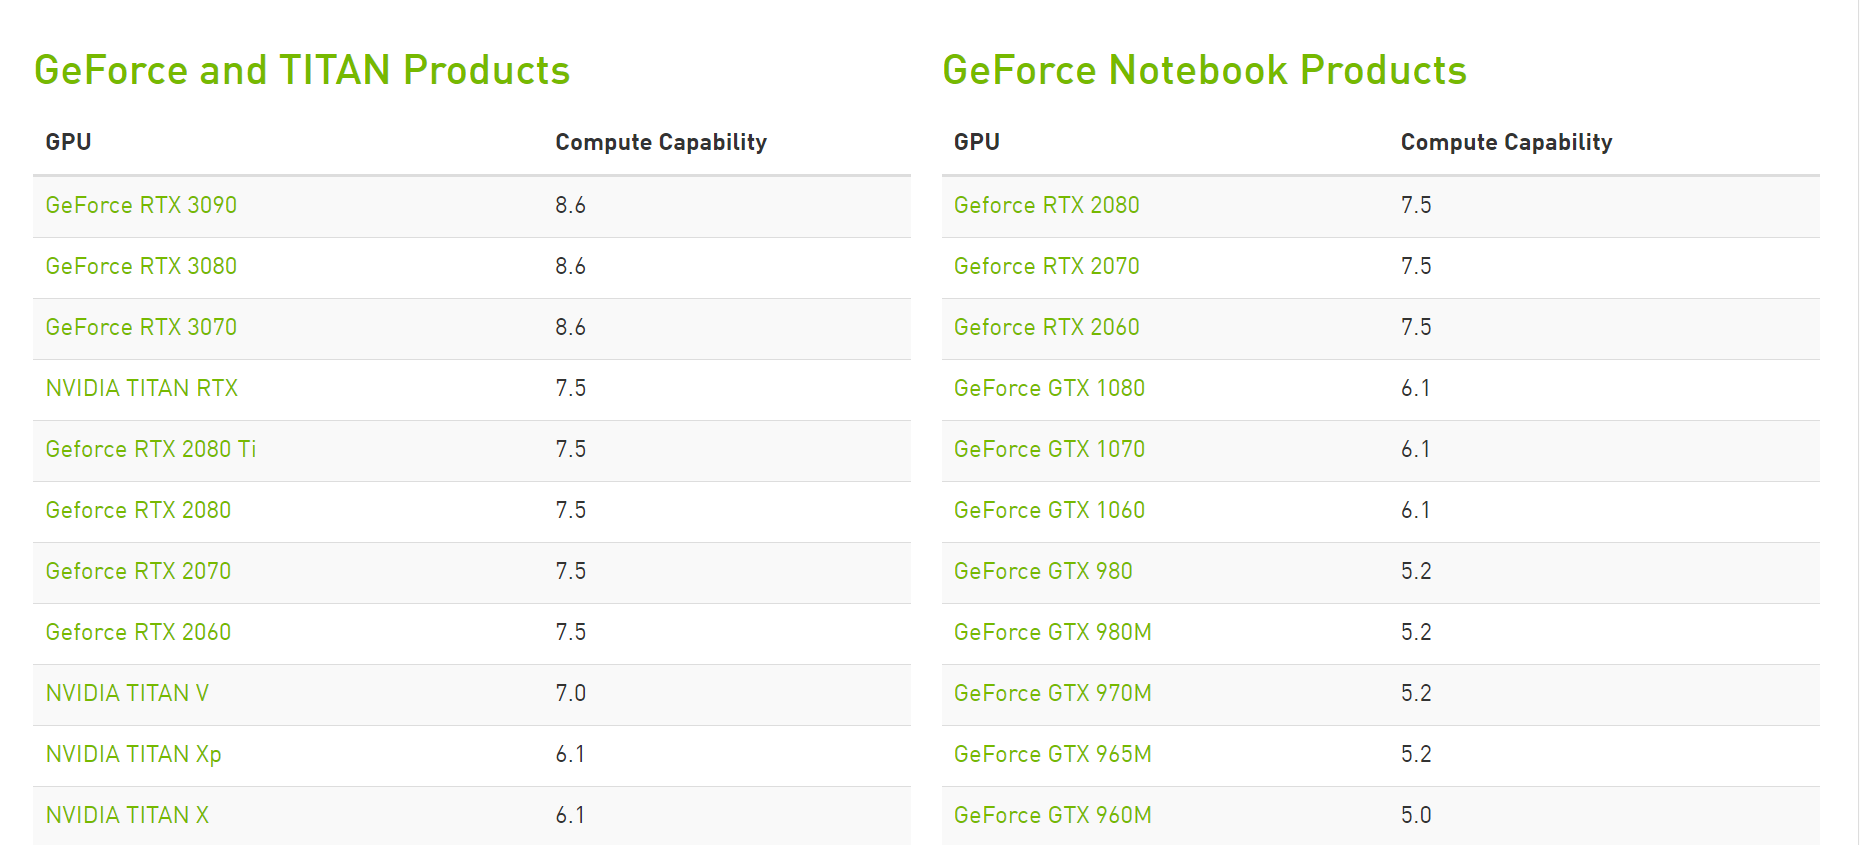 As of Sept. 2020 (This is just the upper half of the list)
If you own a laptop you should check the Notebook products list and if you own a full-blown desktop GPU you must obviously look for the other lineup on the left-hand side.
As mentioned before, I own an RTX 2060 Max-Q which is listed on the right side. By the way, you don’t have to worry about your card’s title exactly matching what’s listed in the webpage, Max-Q and Super are all just designs sharing the same underlying architecture with some differences in TDP, number of CUDA cores and Tensor cores.
For instance, if you own an RTX 2080 Super or 2080 Max-Q or even a 2080 Super Max-Q — it is completely fine if you can just find RTX 2080 in that list. But if your own an RTX 2080Ti or something with Ti at the end, it just means you own the highest-end variant from that particular series, so most probably you’ll find it up there with more capability in terms of VRAM and number of CUDA and Tensor cores.
As of Sept. 2020, To be able to use Tensorflow 2.0 your card’s compute capability must be higher than 3.5 but it is recommended that you have atleast 6 for a better experience. Tensorflow 2.0 also needs CUDA version 10 which in turn requires your driver version to be 418.x or higher. PyTorch requires your CUDA version to be atleast 9.2 or higher, it supports 10.1 and 10.2 as well. The compute capability must be atleast higher than 3.0
CuDNN — CUDA Deep Neural Network library (cuDNN) is a GPU-accelerated library of primitives for deep neural networks. cuDNN provides highly tuned implementations for standard routines such as forward and backward convolution, pooling, normalization, and activation layers.
(Optional) TensorRT — NVIDIA TensorRT is an SDK for high-performance deep learning inference. It includes a deep learning inference optimizer and runtime that delivers low latency and high-throughput for deep learning inference applications.
Installing GPU Drivers
Before anything you need to identify which GPU you are using. It has to be a CUDA enabled GPU.
If you don’t already have a driver installed, you might have to run a Windows Update which automatically handles the installation of useful softwares like Nvidia Control Panel. This will help you in getting to know a lot more information about the GPU, and also a bunch of setting which is off-topic for this article.
If you have Nvidia Control Panel, you can open it up from the start menu or by right-clicking on the desktop and choosing Nvidia Control Panel.
Once you open it you can verify the GPU driver version by clicking on Help -> System Information. The driver version will be listed at the top of the Details window.
 GIF illustration of the process
As shown in the above GIF, my driver version is 456.x, which is well above the minimum requirement of 418.x so I don’t have to worry about installing any new drivers.
It might not be the case for you, to install the latest drivers you can go to this website and enter the correct information about your GPU to download the right driver required.
 Downloading Nvidia Drivers — GIF
After downloading the drivers, run the installers and choose Express Installation for an easier experience. Once you have the drivers installed, you can verify using Nvidia Control Panel.
Another way to install the drivers using the GeForce Experience app from Nvidia if you own a consumer machine originally intended for gaming. This process is very straight forward.
This step is OPTIONAL. You can safely ignore this if you’ve already installed the drivers by following the above step or yours isn’t a gaming machine.
Download the application from this page. Follow the installer and install the application on your machine. Once it is done, you can open the application and go to the drivers tab, check for updates and install the new drivers. You can also verify the driver version in the application.
 GeForce Experience Demo
Since the most important part of installing drivers is now complete, you can either install CUDA toolkit manually or leave conda to handle everything during TF or PyTorch installation which I highly recommend.
If you decide to install it manually you can get the installers from this website and follow the instructions there.
 Installing CUDA Toolkit
Once you have CUDA toolkit installed, you can verify it by running nvidia-smi command either in cmd or Powershell.
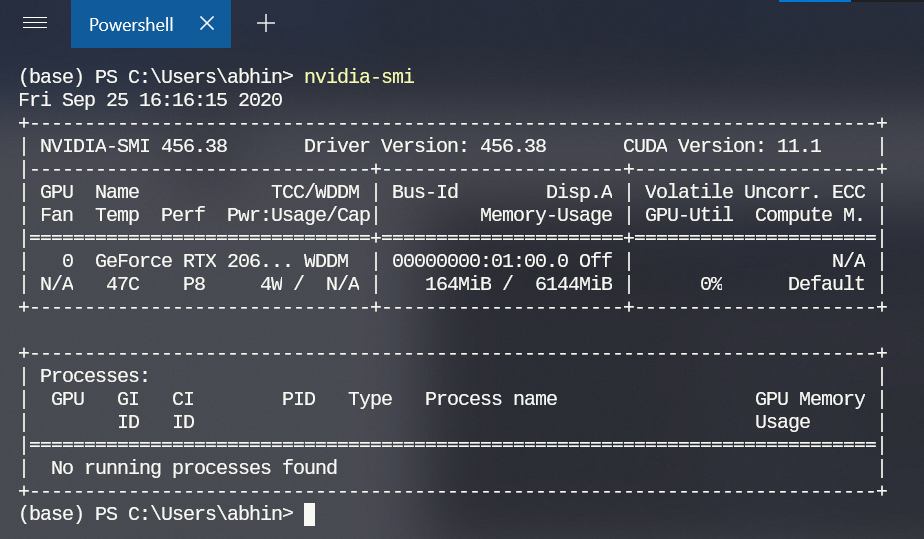 nvidia-smi output
Installing Tensorflow
Now finally on to the crux of this tutorial. If you have done everything else previously mentioned, this step is going to be super-easy.
We will be installing Tensorflow 2.x through conda.
It is very important to enter into the tensorflow environment we created earlier and then follow along,
> conda activate tensorflow
If you are planning to install with GPU support, run the command below
> conda install -c anaconda tensorflow-gpu
This installs TensorFlow GPU through the anaconda channel. One key benefit of installing TensorFlow using conda rather than pip is the conda package management system. When TensorFlow is installed using conda, conda installs all the necessary and compatible dependencies for the packages as well. This is done automatically, users do not need to install any additional software via system packages managers or other means.
And that also includes the right version of CUDA toolkit required for Tensorflow or PyTorch which makes the process much more hassle-free.
The CUDA toolkit that gets installed is only visible inside the environment in which we install tensorflow GPU, that is a huge advantage. Imagine this version of CUDA toolkit messing up your global system’s CUDA versions and PyTorch requiring a completely different version of CUDA to even run. This is the biggest advantage of using a virtual environment. It offers complete isolation between all virtual environments.
If everything was successful you won’t get any error message during installation.
To verify if tensorflow and required packages are successfully installed you can do conda list which displays the list of installed packages where you will find tensorflow related packages and the CUDA toolkit as well.
You can open Python prompt and also verify if tensorflow is installed,
1
2
3
>>> import tensorflow as tf
>>> tf.__version__
'2.1.0'
If you get back the version number, congratulations! You’ve done it! Tensorflow is installed successfully.
 Verifying TF installation in Python prompt
While using Tensorflow in the Python prompt you might get this message saying — “Opened Dynamic Library” which doesn’t mean anything bad, it is just a log message and a good sign that tf is able to open these libraries.
Validating the installations on GPU will be covered later.
To install Tensorflow for CPU-only you must make just a simple change to the installation command
> conda install -c anaconda tensorflow
This will install Tensorflow without CUDA toolkit and GPU support.
Installing PyTorch
Now that we have covered how to install Tensorflow, installing PyTorch is nothing different. Conda makes the whole process surprisingly simple.
First, you should enter into the conda environment we created for torch.
> conda activate torch
If you want to install PyTorch with CUDA support use the following command,
> conda install pytorch torchvision cudatoolkit -c pytorch
The above command will install PyTorch with the compatible CUDA toolkit through the PyTorch channel in Conda.
To install PyTorch for CPU-only, you can just remove cudatookit from the above command
> conda install pytorch torchvision cpuonly -c pytorch
This installs PyTorch without any CUDA support.
You can verify the installation using > conda list as discussed before. To verify it on Python, use the following lines of code
1
2
3
>>> import torch
>>> torch.__version__
'1.6.0'
If it returns back the version number, you’re done installing PyTorch.
Validating your Installation
You might think well everything is right and start using these tools but suddenly when you do that you’ll start to see some fatal errors. If by any chance this happens to you, it might be very specific to your machine and the way you have set things up which is too much for me to cover here before actually getting to know a lot more information specific to your case.
So, I provide a couple of notebooks to at least help you better validate the installations and make sure TF or PyTorch is making use of the intended hardware.
You can find the notebooks in this repository under the folder dl-setup-win. It is up to you to clone the notebook and run the cells. If it displays the correct information then you’re good to go.
I have embedded the gist version of the same notebooks below.
Note: You might face some errors if you do not launch the jupyter notebook from the correct environment. If you want to use tensorflow environment for example, you can launch the notebook from base env and change your kernel to tensorflow env but I have experienced errors while doing that. So to run TF launch your notebook from tensorflow environment and to run PyTorch launch your notebook from torch environment and not from base or something else.
If you know a solution to this problem, let me know in the comments down below.
My personal experience and alternative approaches
I have been using this setup for some light Deep Learning workloads for which my local hardware is sufficient enough. It has been a couple of weeks and so far everything has been functioning as expected in this setup. However, I have tried several other methods before and broke things up quite badly.
One such method I tried was this here, it involves enabling CUDA and Nvidia drivers inside WSL to utilize the GPU for Deep Learning. This, at the moment, is still in preview phase but once this comes out officially this is going to be a real game-changer for DL practitioners. It brings together the amazing WSL2 and the CUDA/GPU drivers.
But as always there is a catch. It is required that you are part of the Windows Insider Program to make use of this feature. And of course, the Insider Preview builds tend to be buggy at best from my experience. For me, it caused a complete failure of all Windows applications at times, GSOD (Green Screen of Death) errors, not booting up properly and driver failures to name a few. I personally don’t like being in an unstable environment, so it was only a matter of time before I decided to opt-out for once and for all.
You could still use a Preview Build with all those features without any problems, it is just that my experience is bad enough with Preview builds to not recommend anyone.
Another alternative is to completely move away from Windows and opt for a Linux based operating system to make things much smoother. It is just that you do not get the fancy GUI installers that take care of everything like in Windows.
In my next post, I’ll discuss how to set up your Deep Learning environment in Linux from scratch without conda.
Thoughts on other packages for Data Science and Machine Learning:
In this post, I have only covered the installation of Tensorflow, PyTorch and Jupyter tools. You might want to install everything else you need for your workflow.
Conclusion
I hope you found this post useful. Hopefully, this helped you set up your Deep Learning environment without any problems. In case you faced any problems, I highly recommend checking out the StackOverflow and Nvidia forums. Also the discussions on PyTorch and Tensorflow GitHub repositories.
I will be writing more tutorials and setup guides in the future too. You can follow me on Medium to never miss a thing. You can also follow me on,
Twitter — LinkedIn — GitHub — Kaggle
Thanks a lot for reading all the way. Have a great day!